

How to Unhide Columns and Rows in Excel
Learn how to quickly unhide columns and rows in Excel with real examples and suggested alternatives.
Certain supporting columns and rows are typically hidden in Excel when the spreadsheet creator wants other viewers to focus on key figures in the visible cells. With this in mind, it will be important for Excel users to learn how to unhide columns and rows when they want to dig deeper into the supporting details of a spreadsheet.
The following sections will cover different unhiding solutions that you may find helpful in Excel:
- Unhide columns
- Unhide column A in Excel
- Unhide rows
- Unhide the first row in Excel
- Unhide all columns and rows in Excel
- Check for hidden rows and columns in the workbook
- Hiding alternatives with Excel grouping
How to Unhide Columns in Excel
When working with datasets with multiple columns in Excel, you’ll sometimes find hidden columns when you see a subtle double-line marker between column letter labels that seem to skip a letter or multiple letters in alphabetical order.
To unhide columns in Excel, simply select the columns to the left and the right of the hidden column section, then right-click the selected columns and choose the Unhide option.
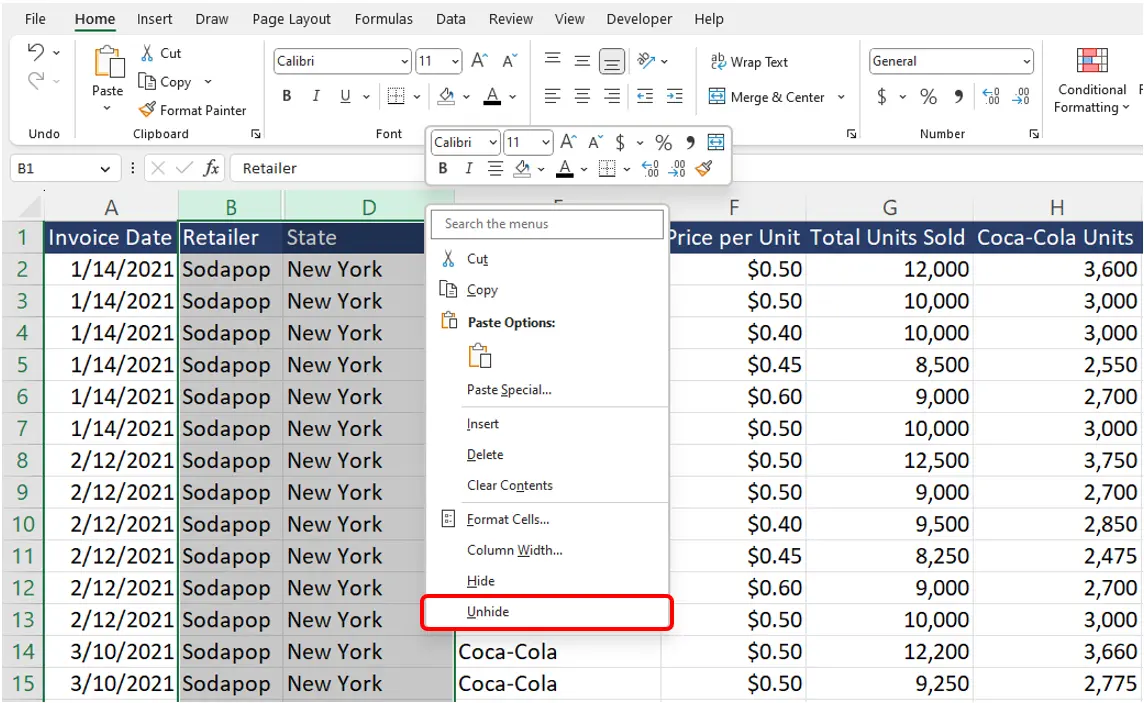
In this particular example, we noticed a hidden column C between the visible column B and column D. To unhide column C, we simply selected the two adjacent columns, then right-clicked the selection to find the Unhide button.
How to Unhide Column A in Excel (First Column)
Sometimes you’ll come across a worksheet with column A hidden. This makes things a bit tricky because you can’t select the column to the left of column A since it's the very first column in the spreadsheet.
To unhide column A, you’ll need to follow a series of steps to select and set column A’s formatting to unhidden.
Step 1: Select a cell in column A by using the cell Name Box
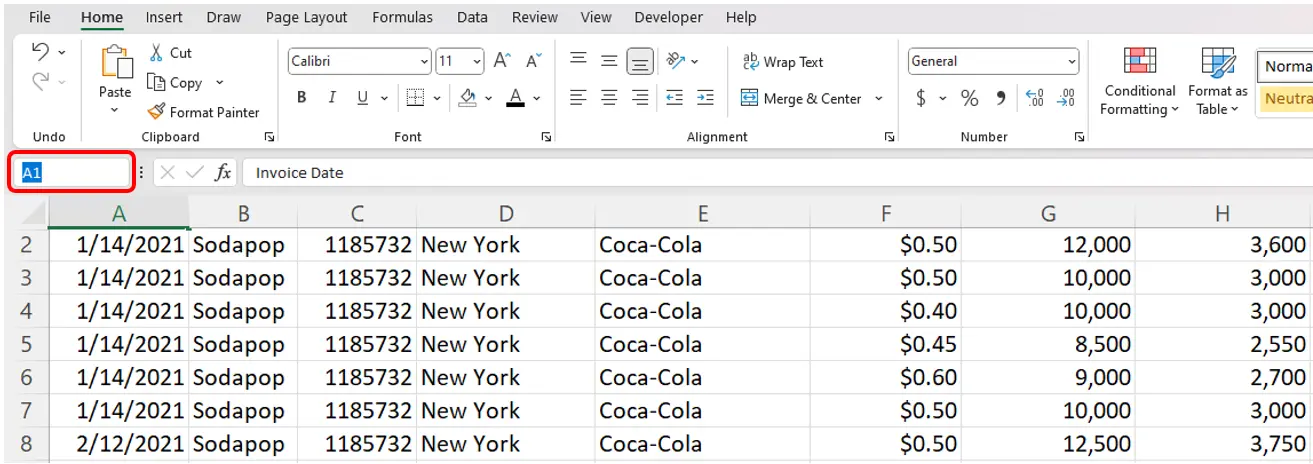
You won’t be able to manually click and select any cells in column A while it is hidden. To work around this, you can click into the name box in the top left corner of the spreadsheet, type “A1” (or any cell in column A), and hit enter.
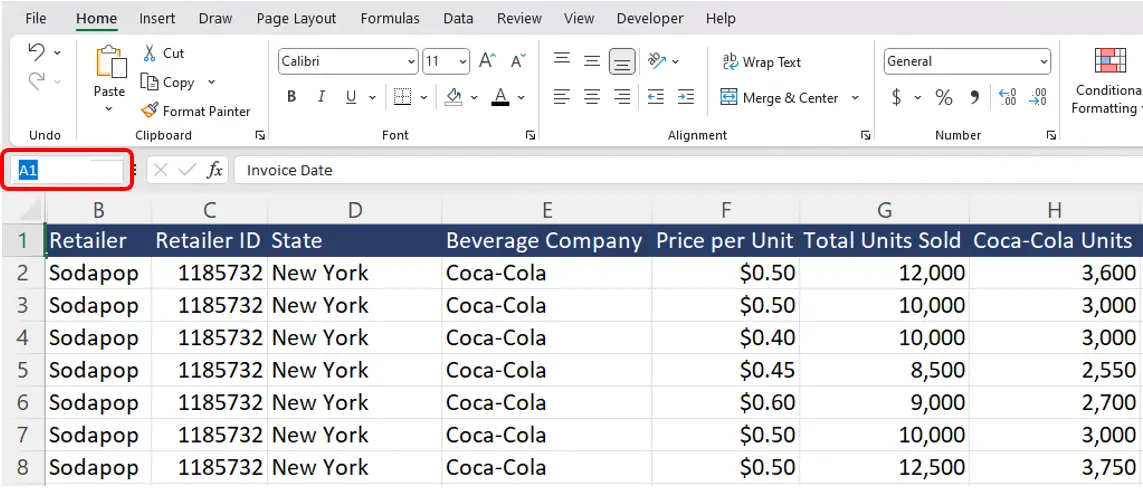
Once completed, Excel will have cell A1 “selected”, but you won’t be able to see the normal green box around the cell while the column is still hidden.
Step 2: Use the Format Dropdown to Unhide Column Selection
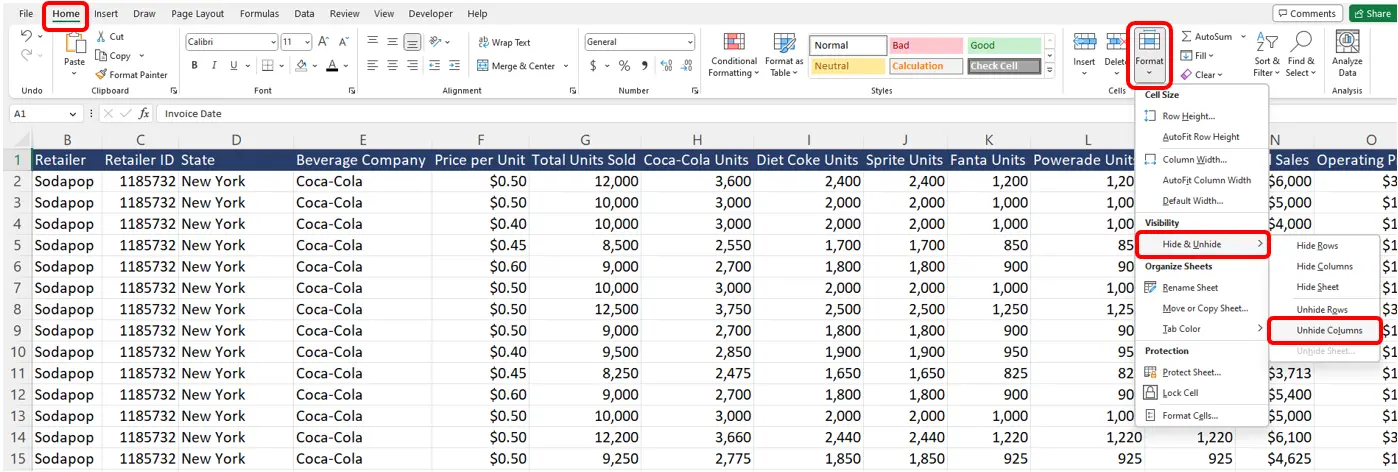
While you have column A selected, go to the Home ribbon, click the Format Dropdown, select Hide & Unhide, then click on Unhide Columns. You should now see column A unhidden and visible on the spreadsheet.
How to Unhide Rows in Excel
Similar to hidden columns, you’ll sometimes find hidden rows when you see a subtle double-line marker between row number labels that seem to skip a number or multiple numbers in numerical order.
To unhide a row in Excel, select the adjacent rows to the top and bottom of the hidden row section, then right-click anywhere in the selection and select Unhide.
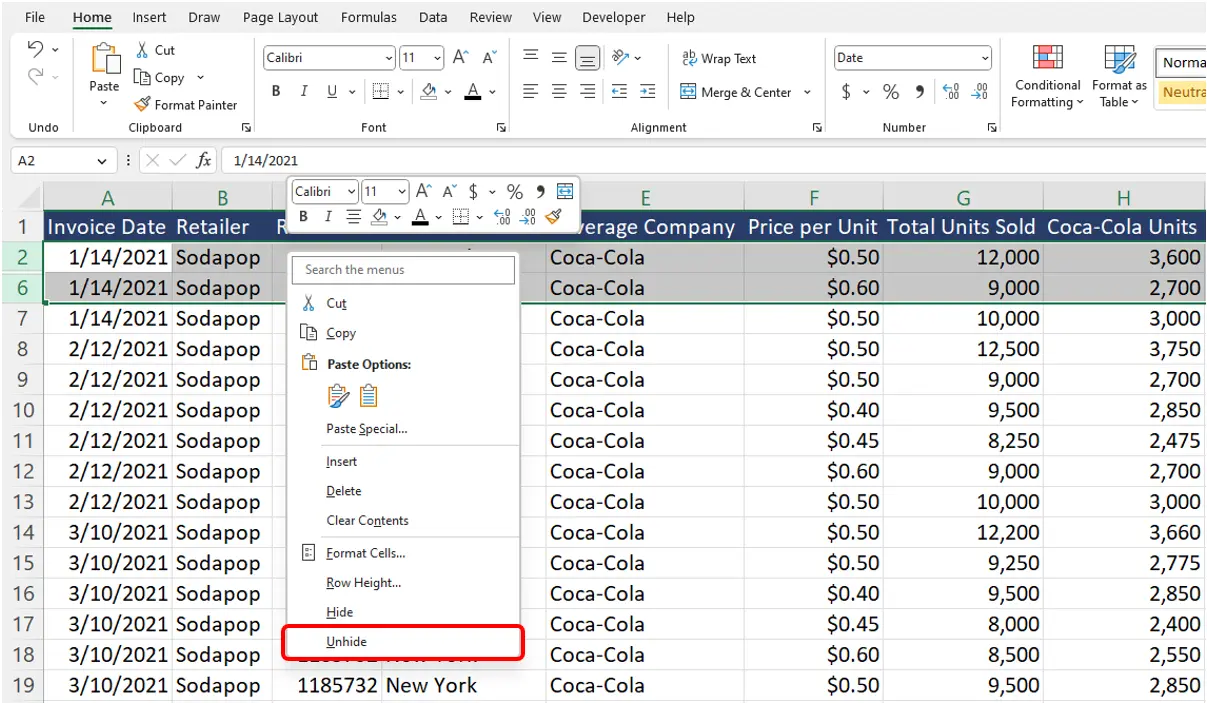
In this particular example, we can see the user has hidden rows 3, 4, and 5 since we see a double-line marker between rows 2 and 6. To unhide these rows, we simply select rows 2 and 6, right-click the selection, and select Unhide.
How to Unhide Row 1 in Excel (First Row)
Some worksheets will have a hidden first row (row 1). Workbook viewers will likely want to unhide this row to see important information as you’ll often find key column headers in the first row of a spreadsheet.
With this in mind, you will have to follow a 2-step process to unhide row 1 as you won’t be able to simply select the row above and below to unhide the row.
Step 1: Select a cell in row 1 by using the cell Name Box
You won’t be able to manually click into a cell in the first row while it is hidden. To work around this, you can click into the name box in the top left corner of the spreadsheet, type “A1” (or any cell in row 1), and hit enter.
You’ll then see a subtle green line indicating your cell selection within the hidden first row.
Step 2: Use the Format Dropdown to Unhide Row Selection
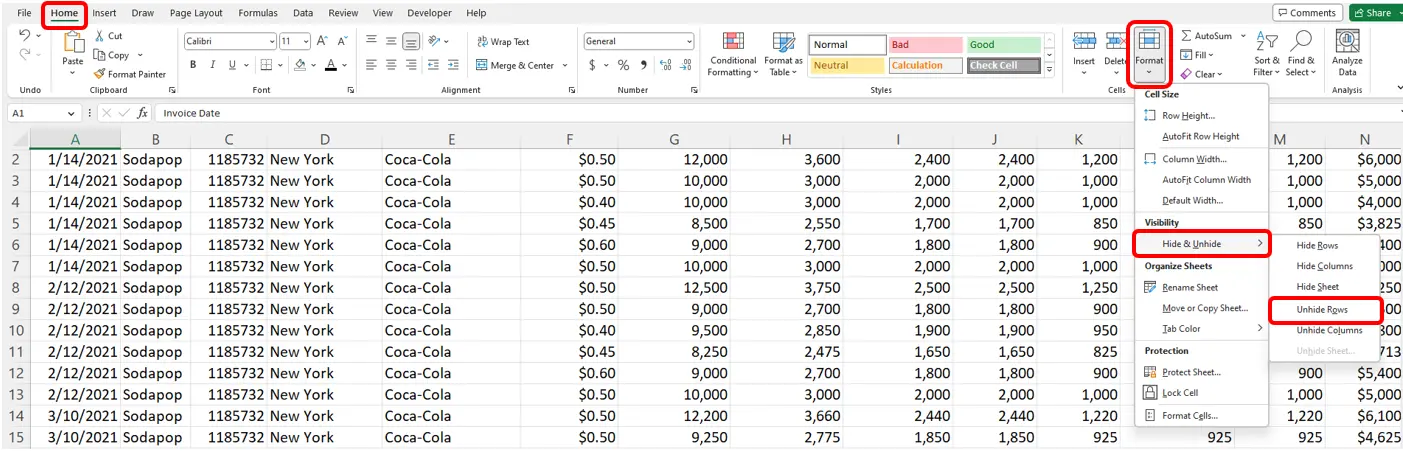
Then similar to unhiding column A, you’ll have to use the Format ribbon tool to unhide the row. While you have a cell in row 1 selected, go to the Home ribbon, click the Format Dropdown, select Hide & Unhide, then click on Unhide Rows. You should now see row 1 unhidden and visible on the spreadsheet.
Unhide All Columns and Rows in Excel
Sometimes your worksheet may come with multiple sections of hidden columns and rows. This is where it will be convenient to select the entire spreadsheet to unhide all columns and rows.
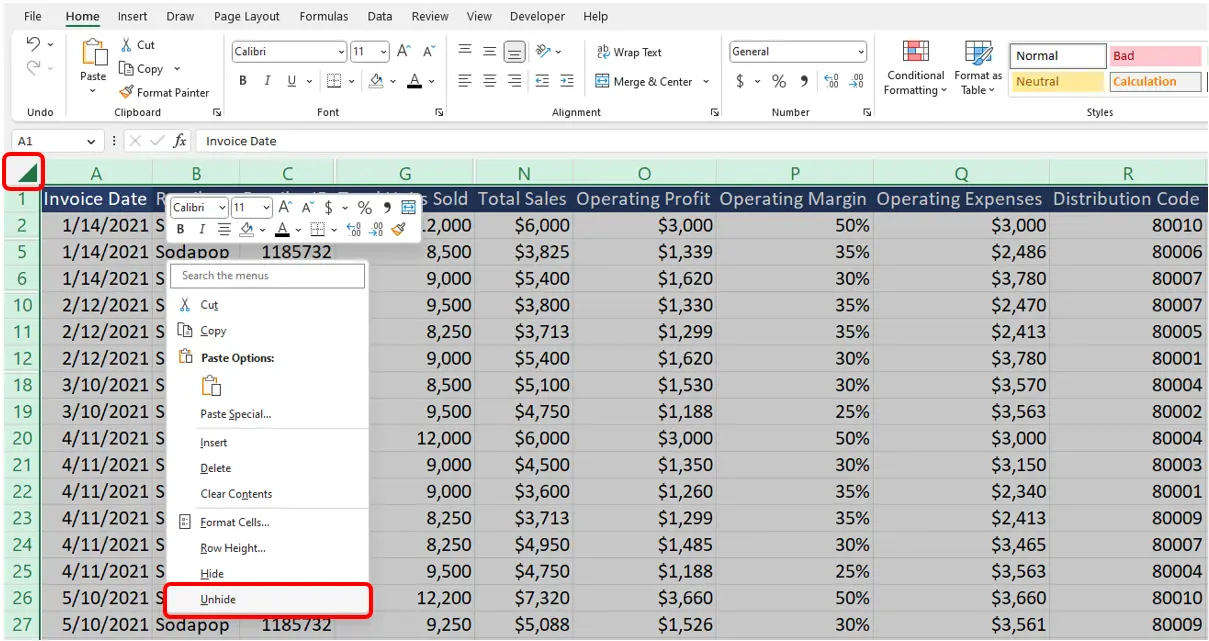
To unhide all columns, select the entire spreadsheet by clicking on the top left corner of the spreadsheet (look for the dark-grey triangle). From there, right-click anywhere in the green column header labels, and select Unhide. Similarly, you can unhide all rows by selecting the entire spreadsheet, right-clicking anywhere in the green row number labels, and selecting Unhide.
Check for All Hidden Rows and Columns in Workbook
You can also use Excel’s built-in workbook inspector tool to check for the number of hidden columns and rows in the workbook. This can be useful if you want to perform a quick check without having to manually scroll through all columns and rows on the spreadsheet.
To check for the number of hidden rows and columns, you’ll need to follow these 4 steps.
Step 1: Go to workbook file options
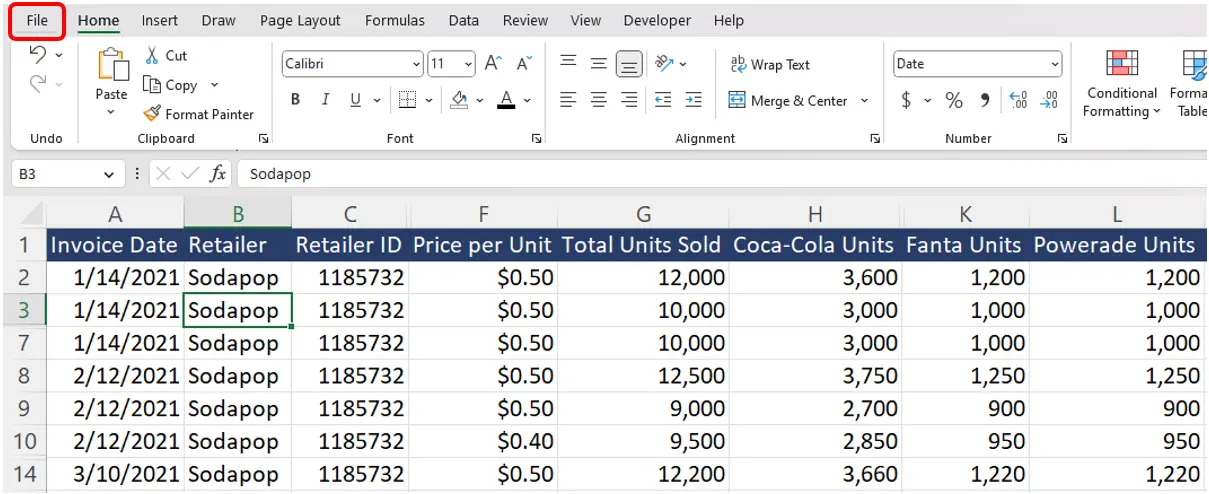
First, open the workbook and click on File in the top left corner.
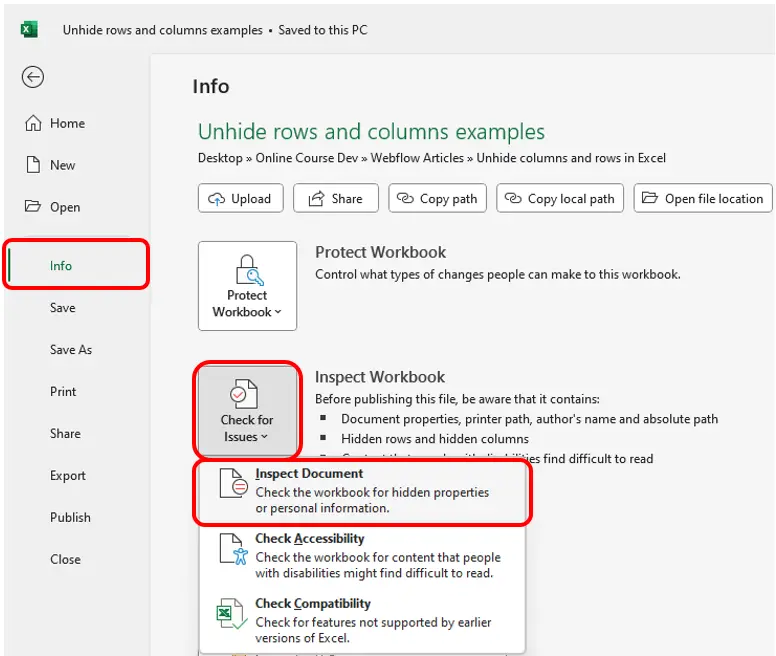
Step 2: Select inspect document
Next, select the Info tab, click the Check for Issues dropdown, and select Inspect Document.
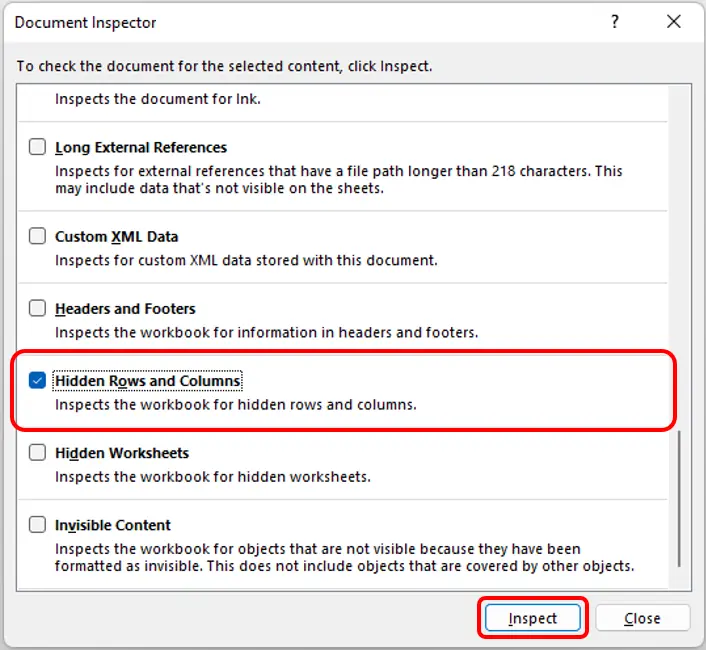
Step 3: Inspect for hidden rows and columns
Once you have initiated the Document Inspector, scroll down and make sure to check the box for Hidden Rows and Columns. Then click the inspect button.
Step 4: Review hidden row and column counts
After the Document Inspector processes the workbook, you’ll be able to see the number of hidden rows and columns in the workbook.
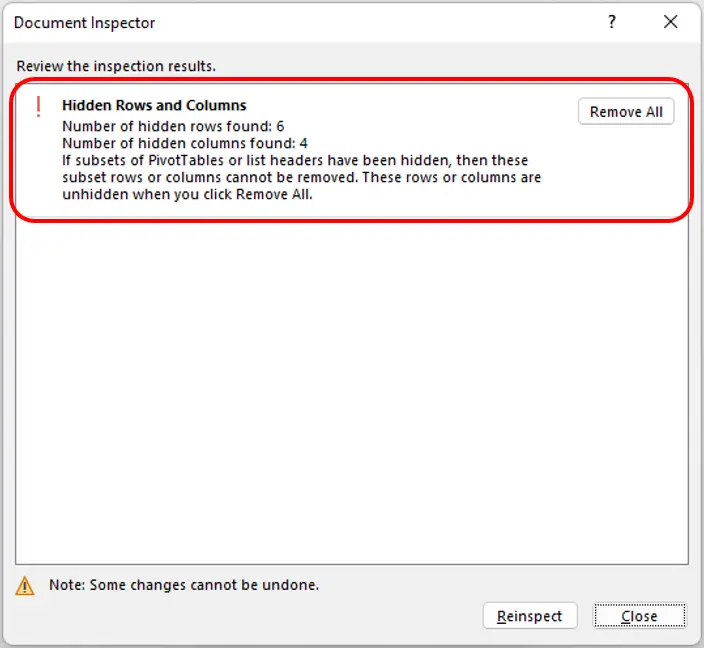
Note: The remove all button deletes all hidden rows and columns and does not simply unhide them from the workbook.
Hiding Alternatives: Grouping
Many experienced Excel users don’t recommend using the hidden rows and columns feature as hidden columns and rows can be very difficult to spot when quickly browsing through an Excel spreadsheet.
Instead, many business and finance professionals will use the Excel grouping tool to allow users to easily expand and collapse a segment of rows or columns.
To group multiple columns, select your target columns, and use the keyboard shortcut keys alt + shift + right arrow. Alternatively, you can go to the data ribbon and use the group and ungroup buttons.
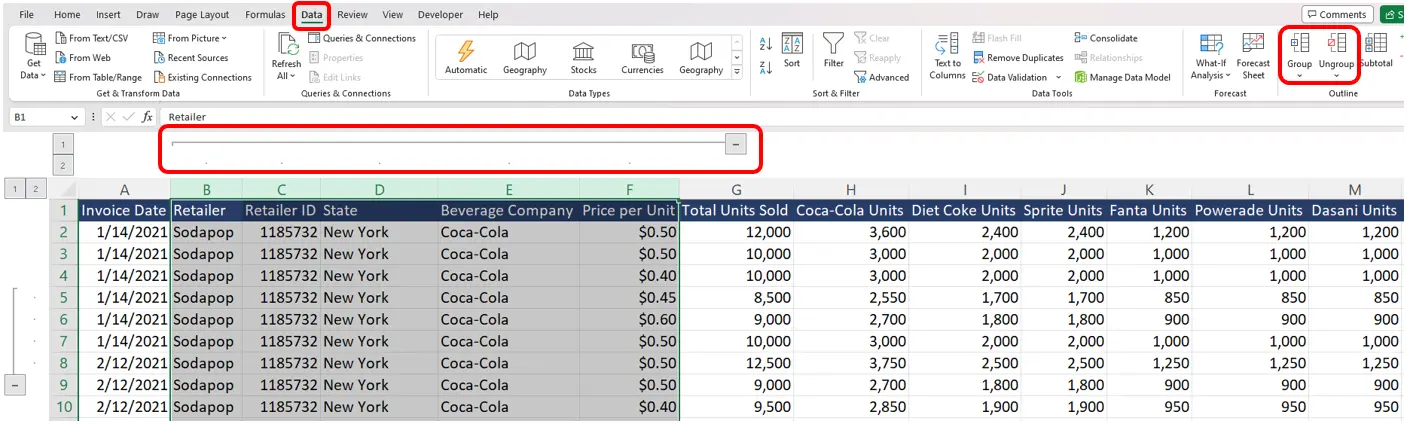
Once you’ve grouped your columns, you’ll see a small toggle button (+/-) that will allow you to expand or collapse your group. As you can see, the added button on the spreadsheet makes it much easier for users to recognize collapsed columns.
This grouping feature can also be applied to selected rows.
Additional Resources
If you found this article helpful, consider checking out our Excel for Business & Finance Course where we cover all the Excel fundamentals you’ll need to perform in any business or finance role.
Other Articles You May Find Helpful


Ready to Level Up Your Career?
Learn the practical skills used at Fortune 500 companies across the globe.