

Excel Data Validation
Learn how to use Excel Data Validation to restrict the type of values you can enter in your Excel spreadsheet.
Usage:
Excel data validation is a feature that allows you to set rules for data entry in a cell or range of cells. This is useful when you want to ensure that the data entered in a cell or range is accurate, consistent, and meets certain criteria. Data validation can help you avoid input errors and improve the quality of your data.
For practical use, think about creating an Excel worksheet and sharing it with others to fill in the requested information. The requested information can, for example, include the user's name, date, and age. Data validation is commonly used to make sure the user inputs the correct data type. So the user for example cannot type a number into a cell intended for names and vice versa where the user can’t type text into a cell intended for numbers.
Example 1: Number Restrictions (Restricting Age Column)
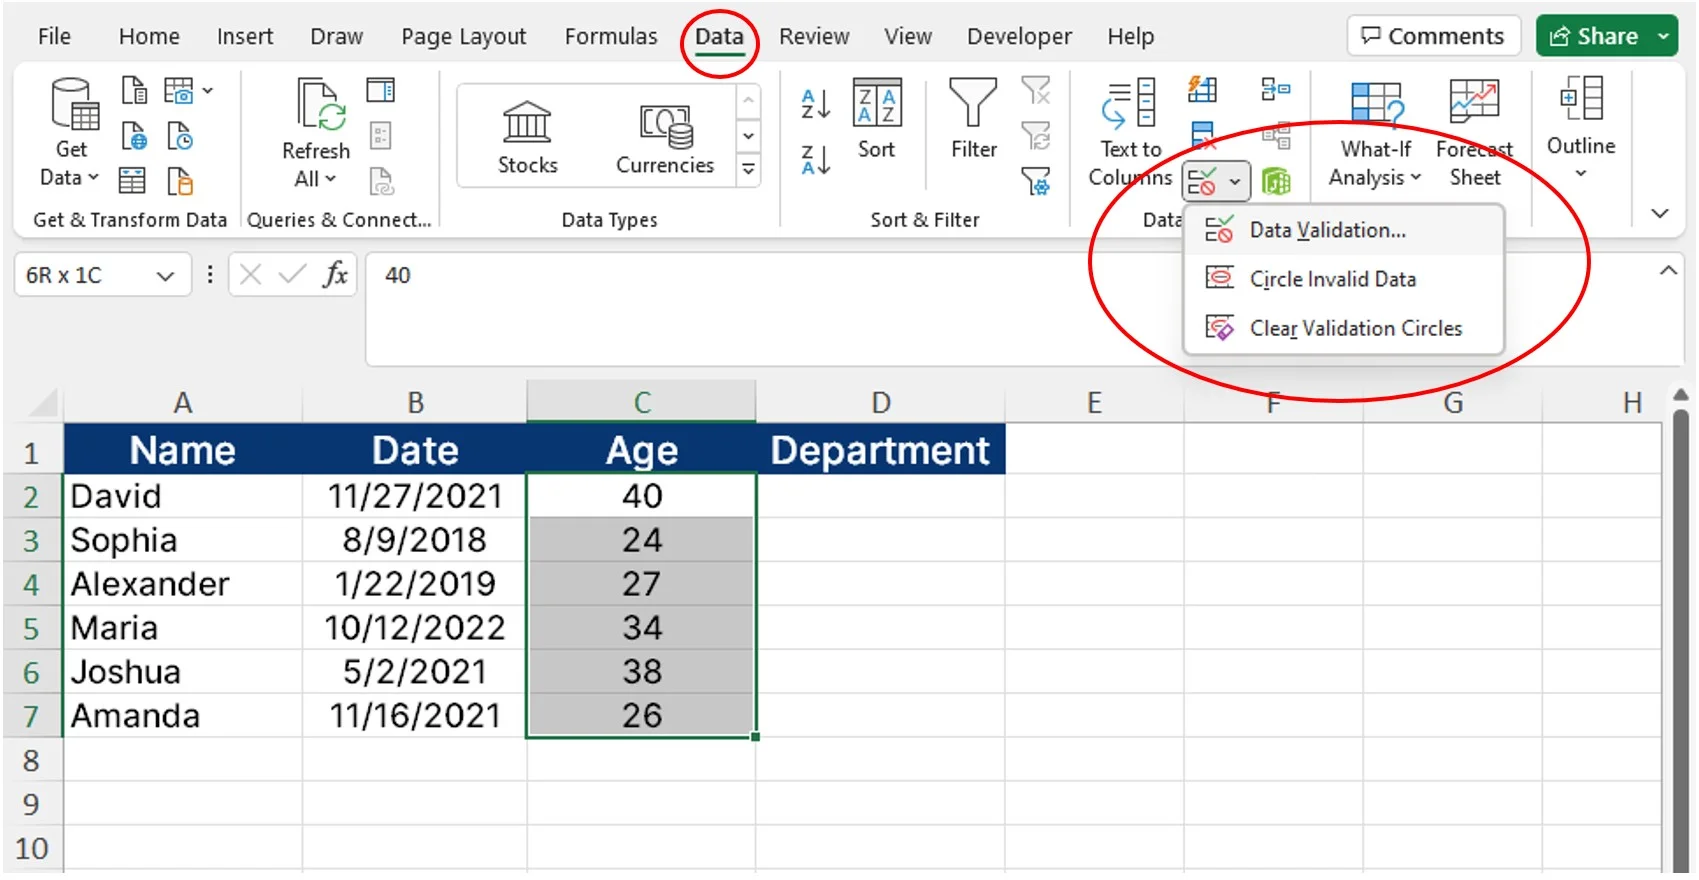
Let us look at an example where the user must fill in their name, date of entry, age, and department. To ensure the data the user enters is valid, select the column(s) used for data entry. First, go to the ‘Data’ ribbon and click ‘Data Validation'.
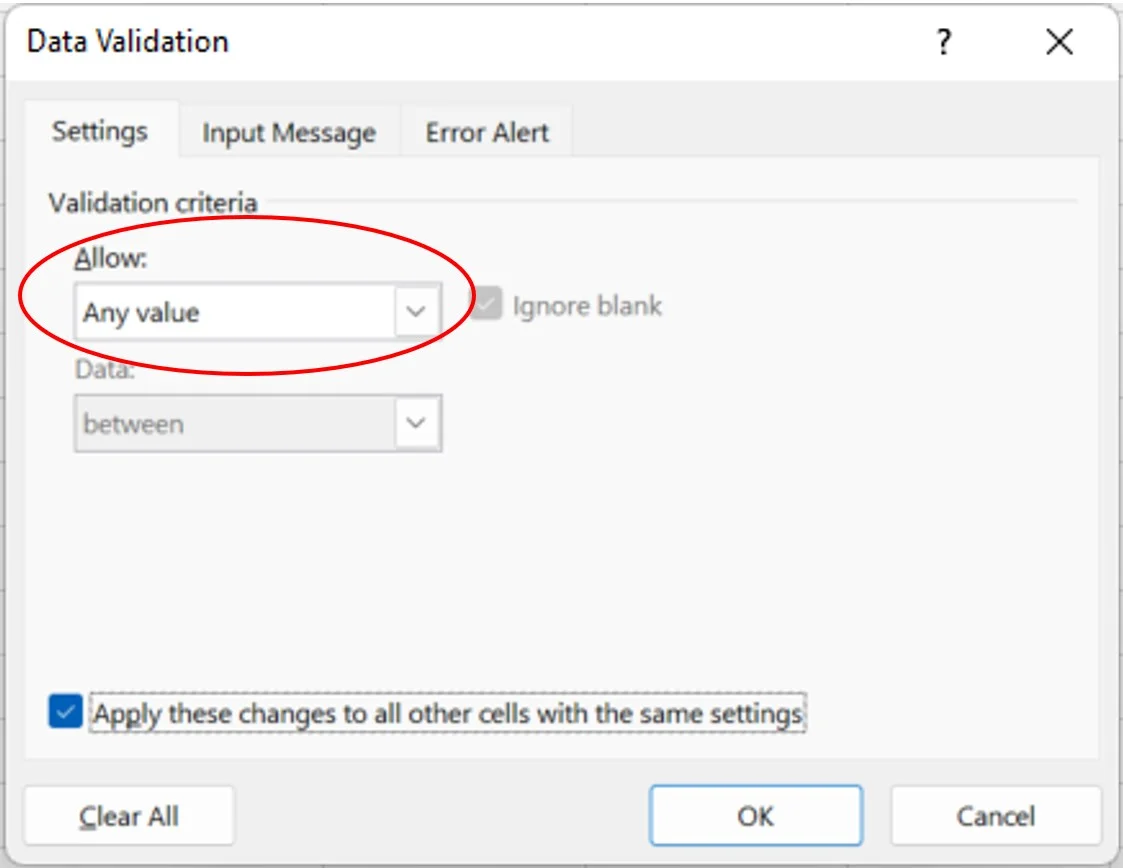
The default selection is set so that any value can be entered in this column.
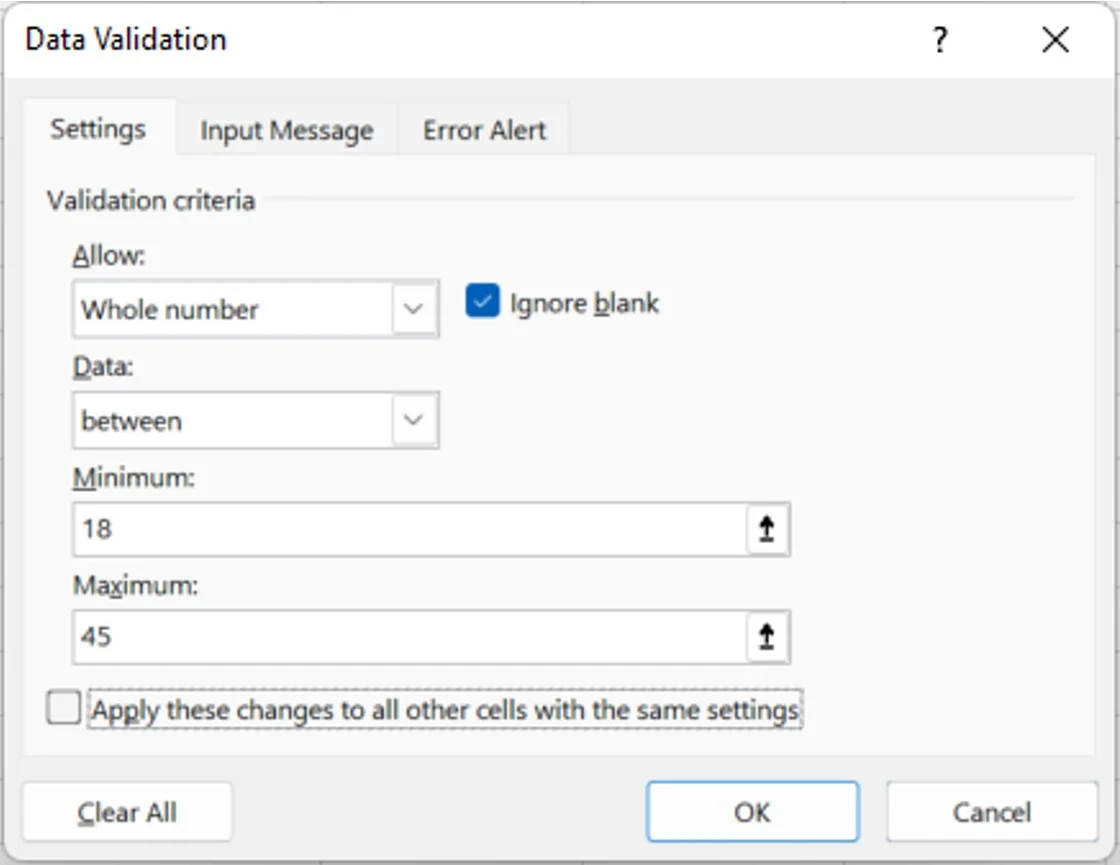
However, this is not the ideal representation of the values that need to be inserted for the ‘Age’ column. With this in mind, the user can change the settings to only allow whole numbers. Additionally, the user can create a specific range for the ages inserted, here we use 18 years old (as a minimum) to 45 years old (as a maximum).
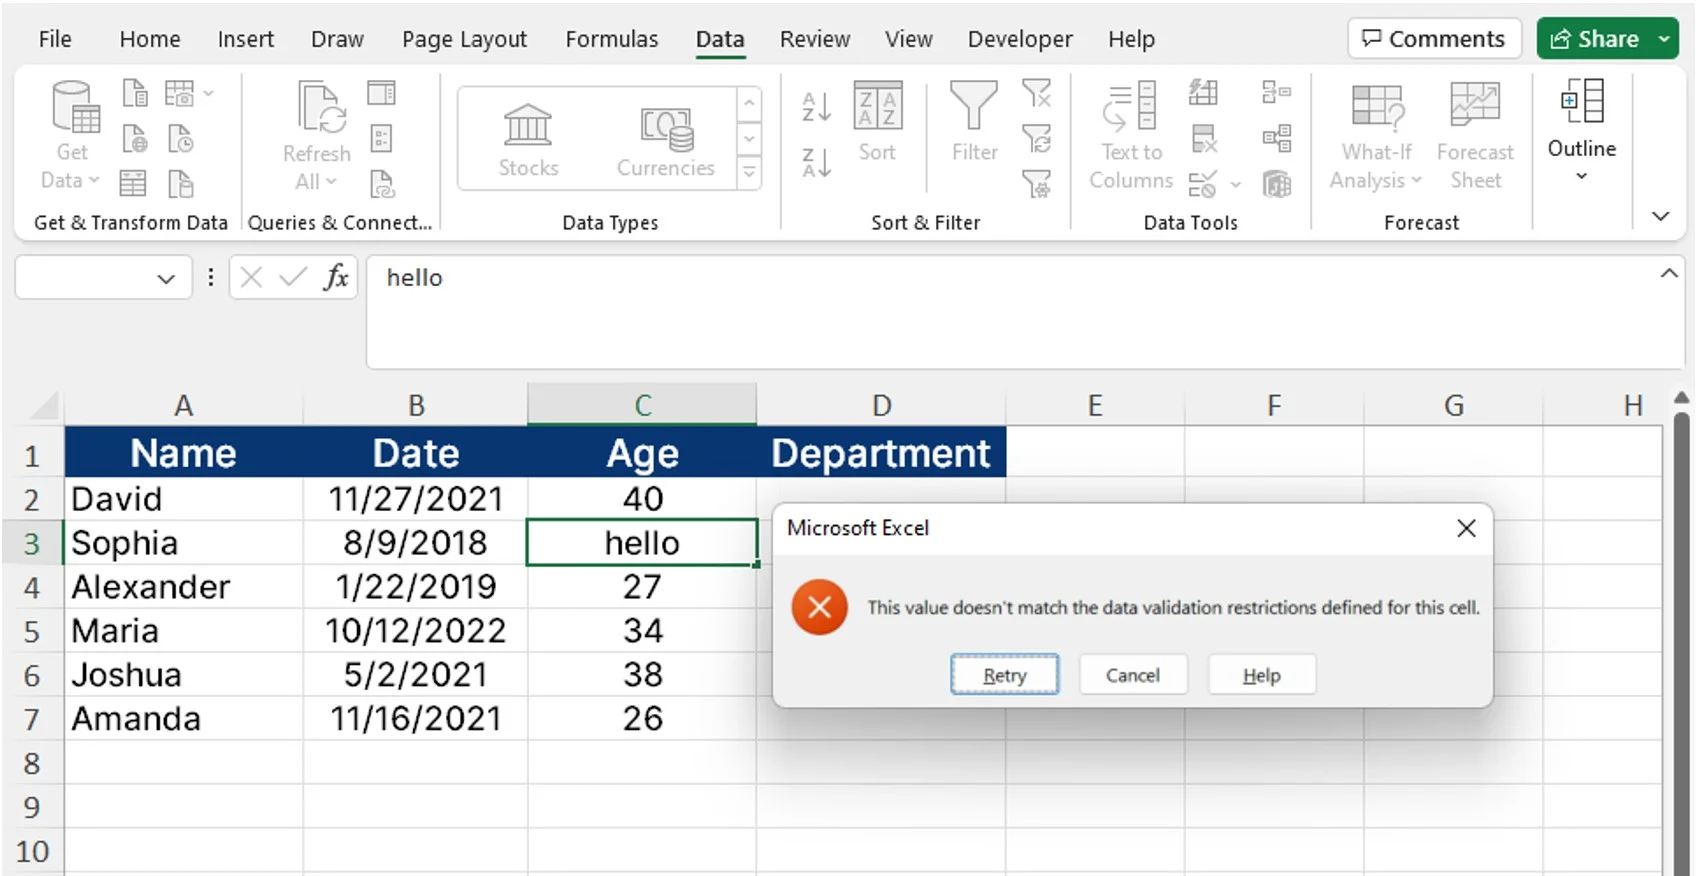
Now, if the user attempts to enter non-numbers or numbers less than 18 or greater than 45, a pop-up notification will appear, alerting the user that there is an input error.
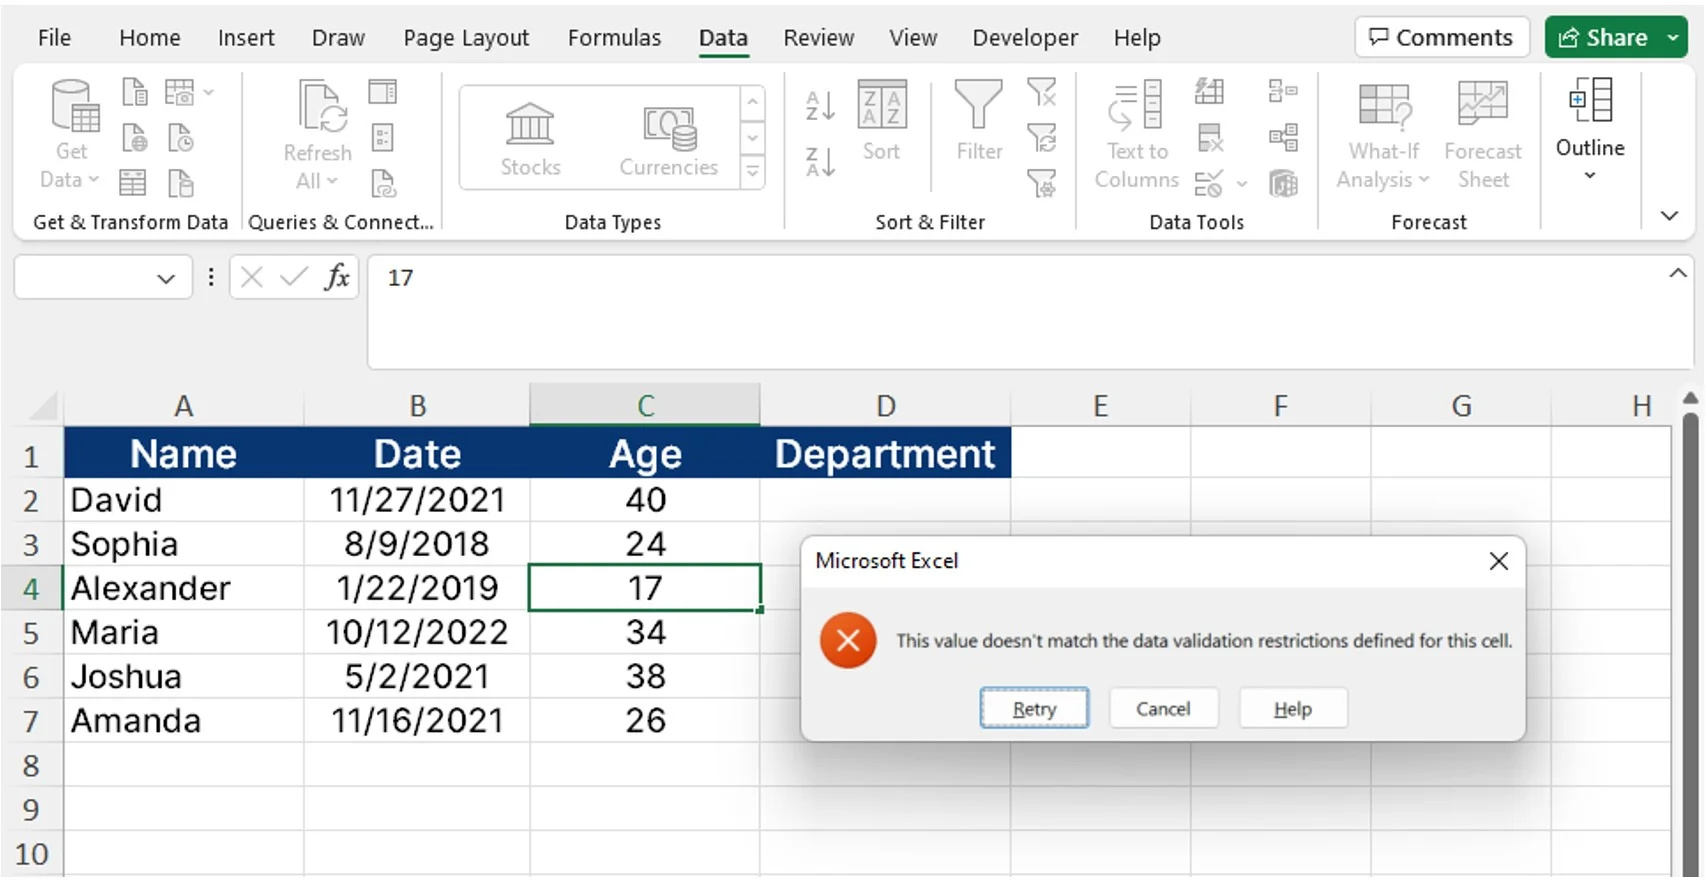
Error Scenarios
#1 Typing a word in the Age column
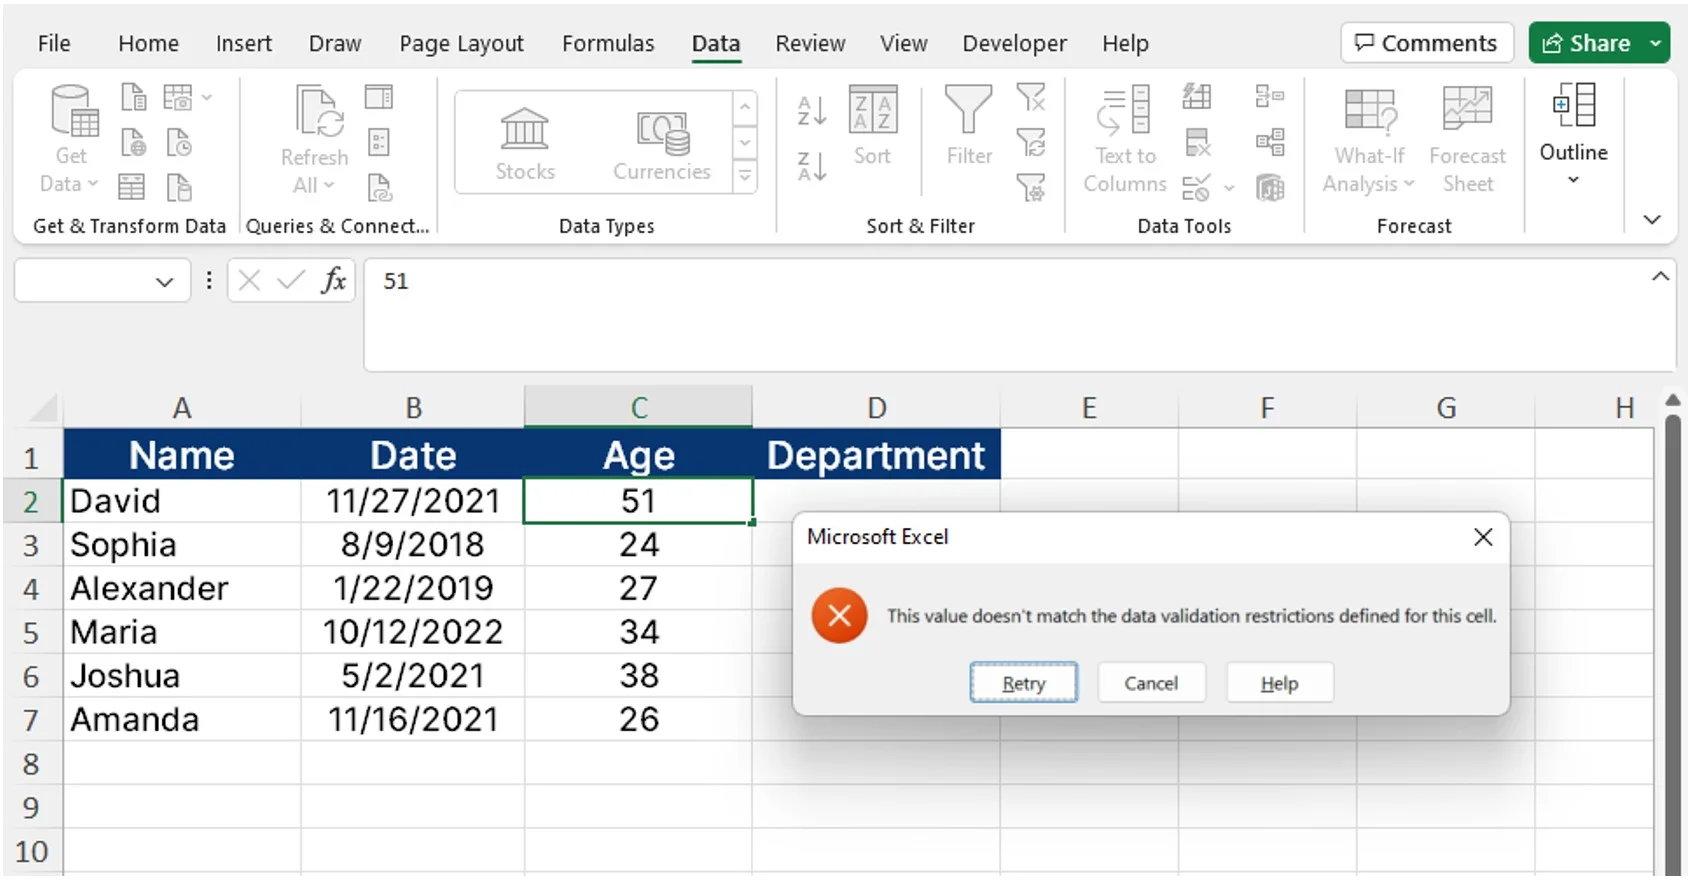
#2 Number less than 18
#3 Number greater than 45
Example 2: Date Restrictions
Next, we can look at another example of how the user can control entered data. Take, for example, the ‘Date’ column which records an entry date. This column has dates ranging from 2018 to 2022. Let’s walk through how you can apply date criteria to ensure the dates are entered within a certain range.
First, select the dates of entry from the ‘Dates’ column and click the ‘Data Validation’ button.

Next, apply the necessary restrictions for this column. We want this column to include only dates as values and range from 01-01-2021 to 12-12-2022.

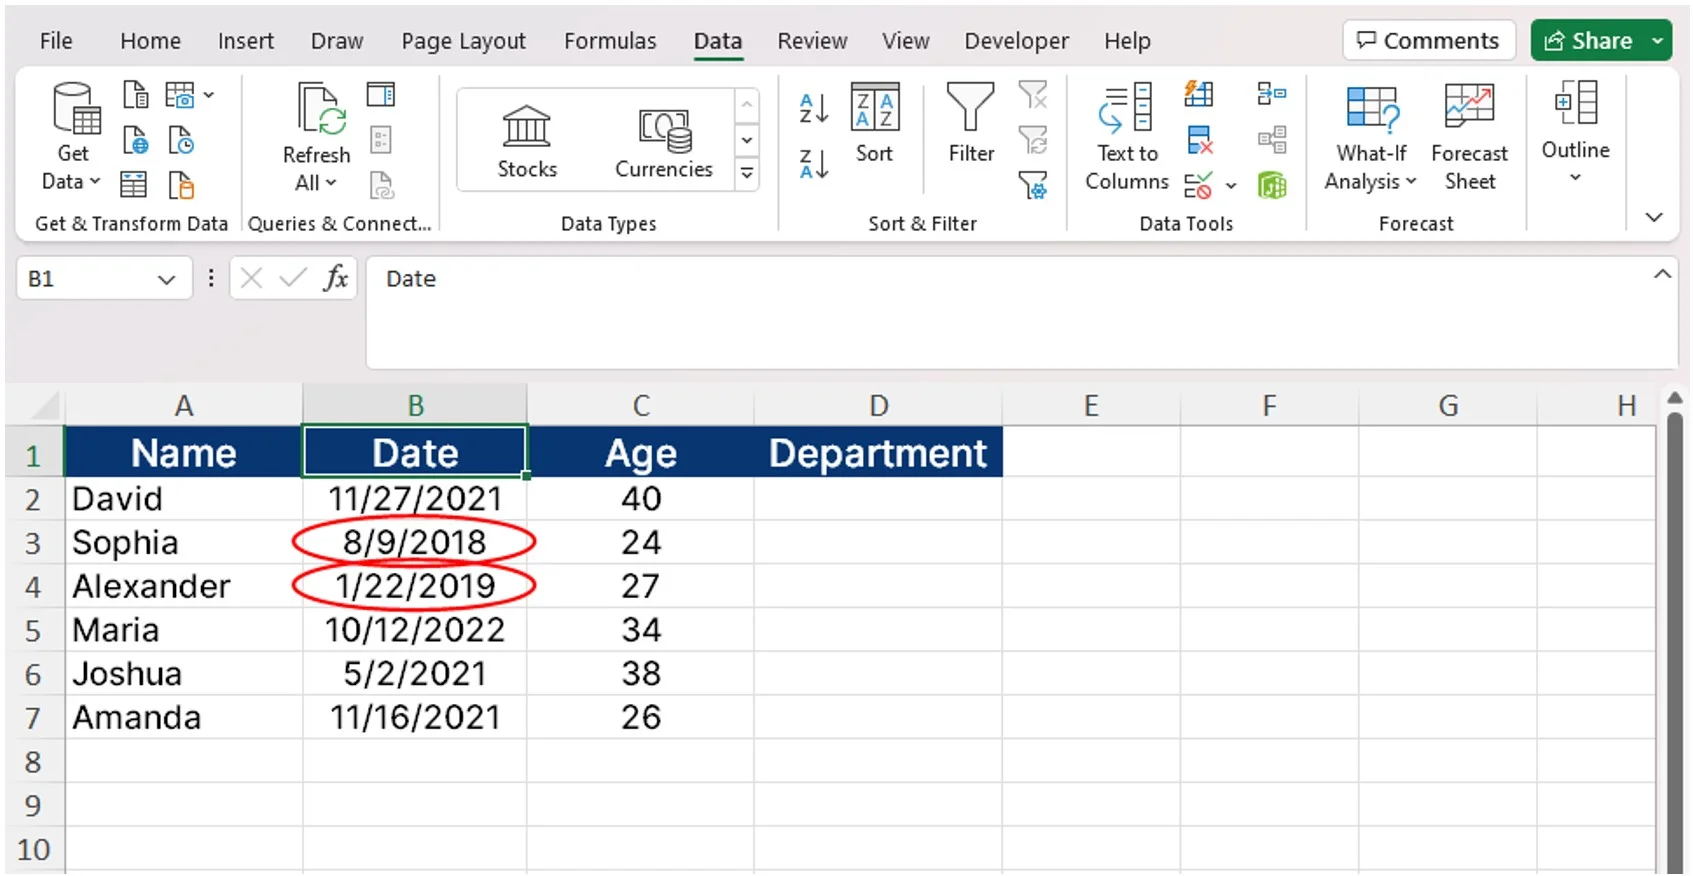
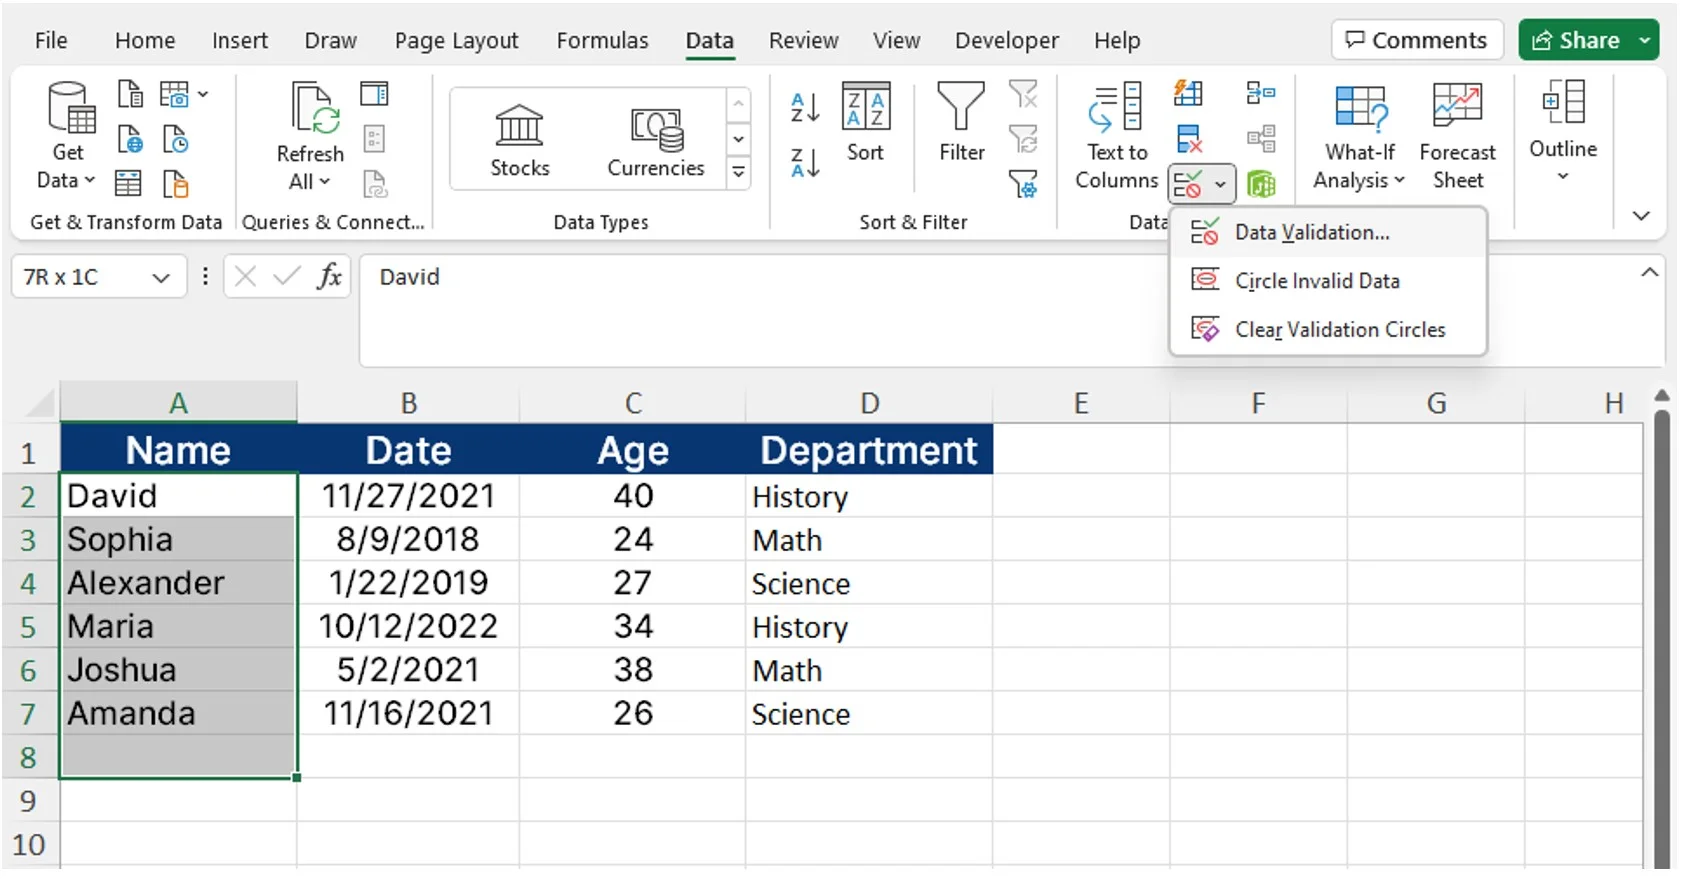
After applying these restrictions, Excel does not automatically highlight values that fall outside the set range. To pick out dates outside the range, go to ‘Data Tools’ and click ‘Circle Invalid Data’.

After clicking ‘Circle Invalid Data’, Excel will display the values within the selected column that fall outside the restrictions placed. For example, the entry dates before 01-01-2021 are circled in red to signify an error.
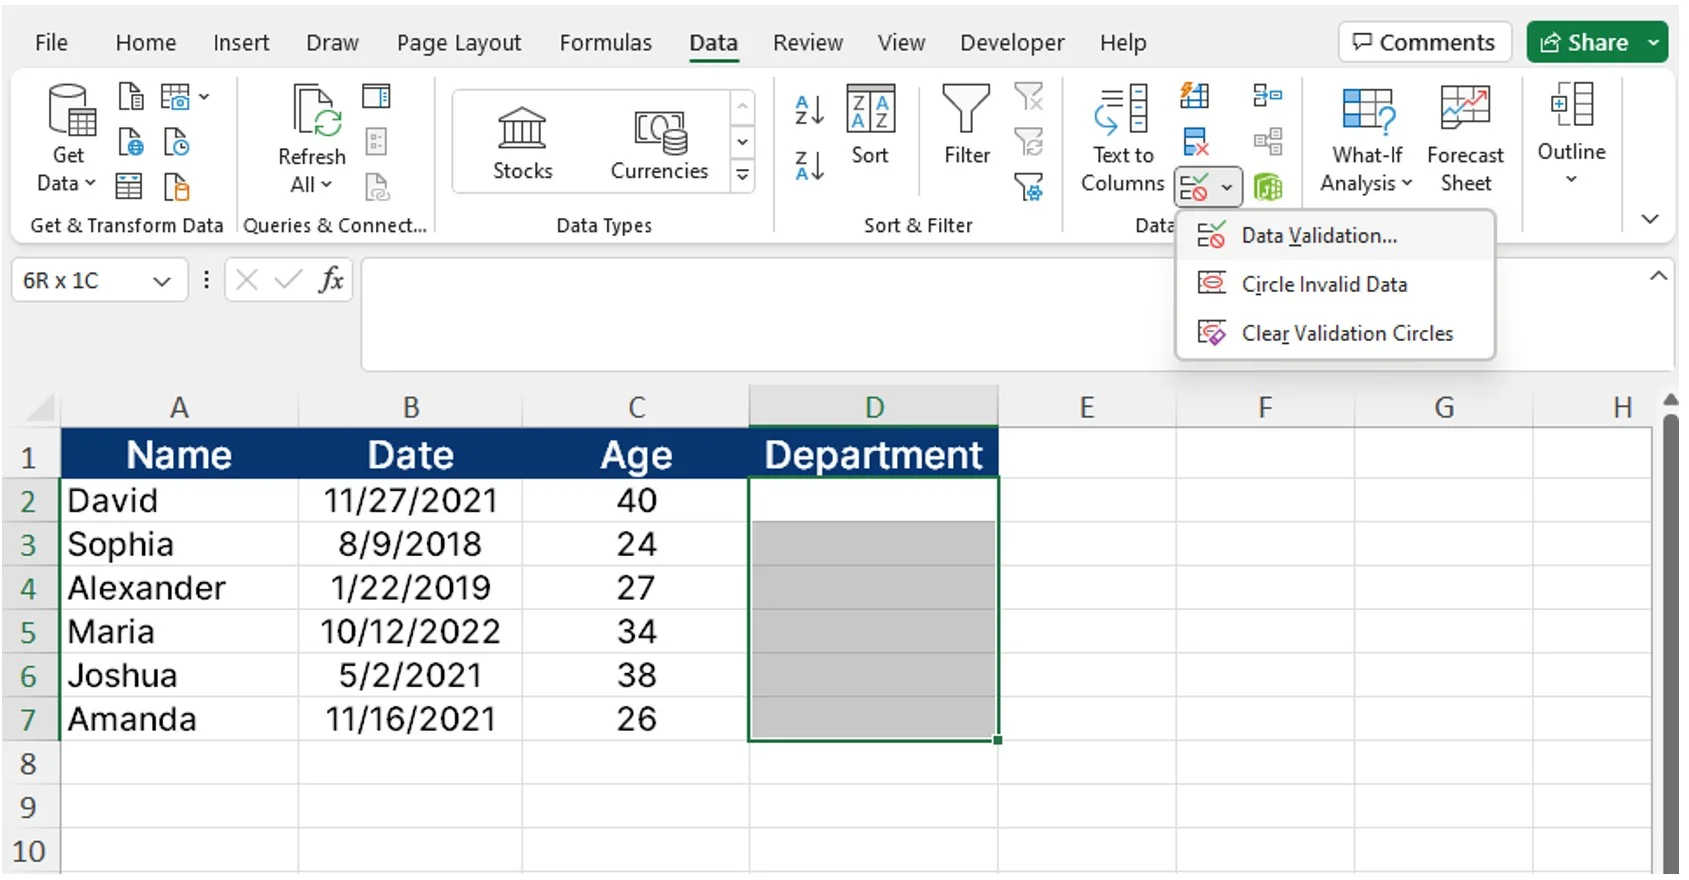
To remove the entry dates circled in red, the user needs to click ‘Clear Validation Circles’ listed under ‘Data Tools’.
Example 3: Input List (Department Selection)
Now let’s take a look at how we can use data validation to set up dropdown input lists that users can use to enter data in the department column. This feature is useful because it allows us to control a fixed set of inputs so that the user cannot enter anything outside of the given list.
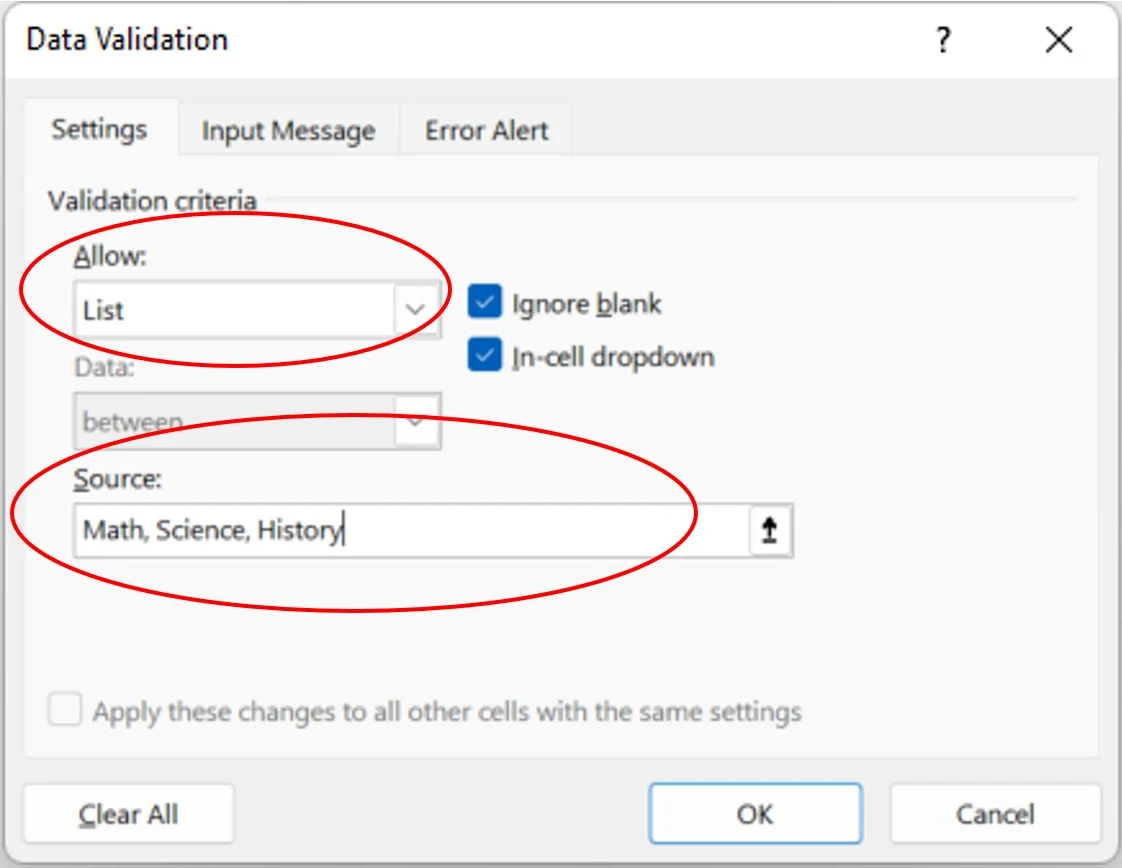
In this particular example, we are going to set up a data validation list that only allows the user to input one of three departments: Math, Science, or History.
First, highlight the department column cells and go to data validation. Then select allow “List.” From there, you can go to the source input bar and put in all of your input options separated by commas. In this example, we would write our 3 options like this: “Math, Science, History.”
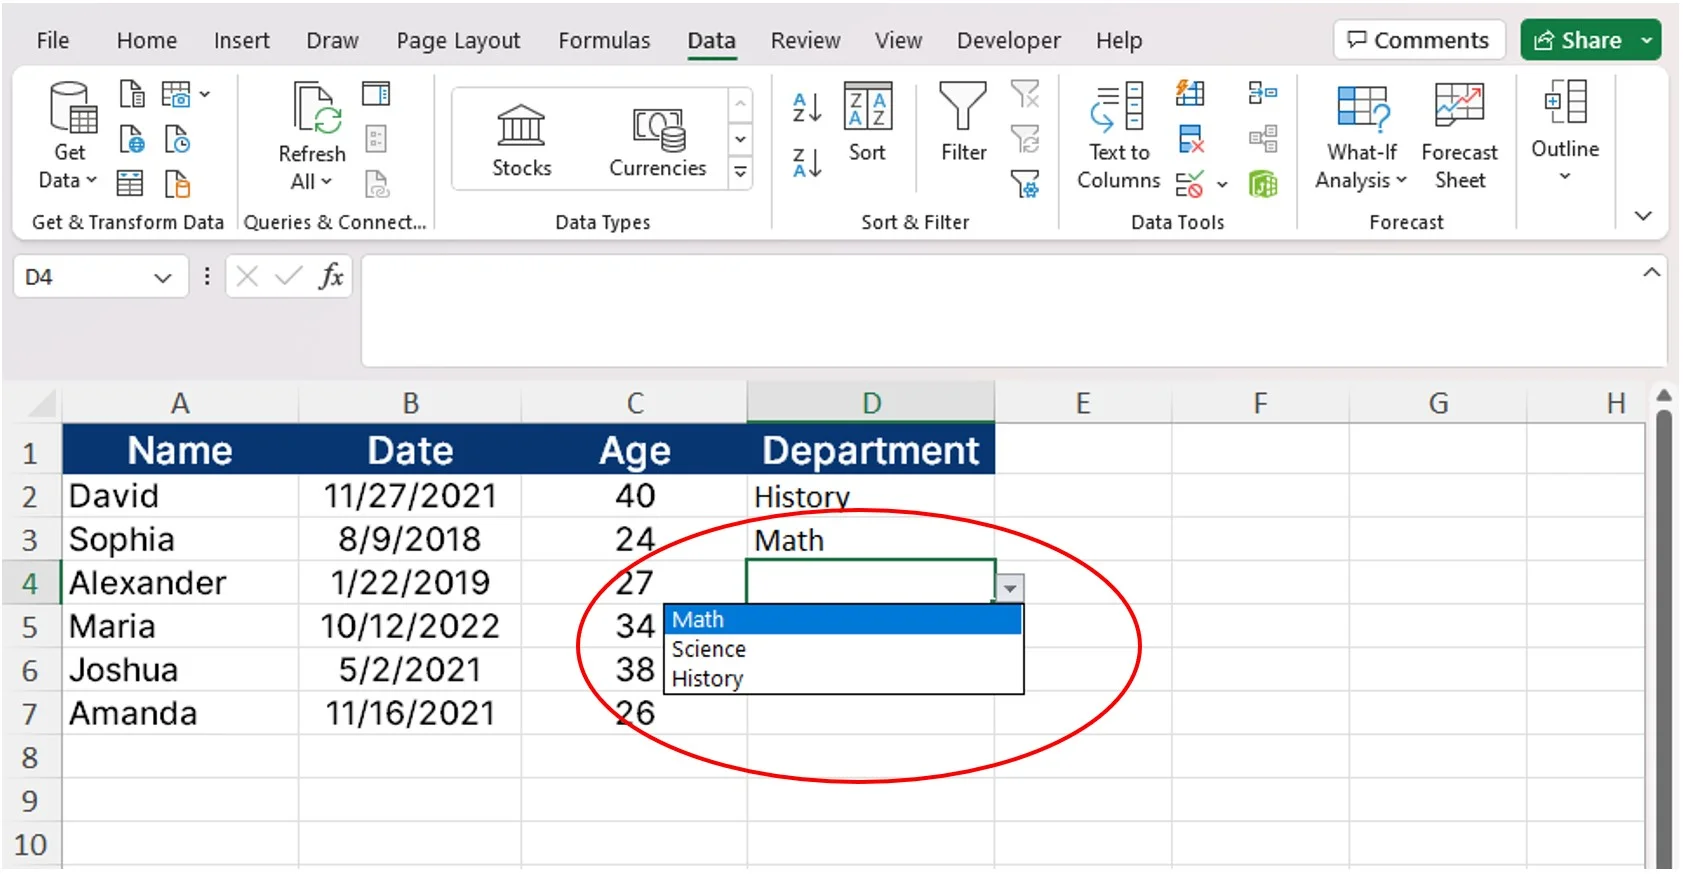
Once that is applied, you’ll see that all of the department cells now have this dropdown input feature that forces the user to only select values from the list.
Example 4: Input Prompt (Name Column Message)
Lastly, when setting up data validation restrictions, the user can enable Excel to display an input message. The input message will provide a pop-up guidance message to help the user correctly input data.
For example, the user can insert an input message to remind the user to only input their first name. To do this, hover over the 'Name' column and click the 'Data Validation' button.
First, the user can restrict the ‘Name’ column by selecting ‘Text length’. Then, the user needs to pick the desired text length that captures the user’s first name, such as a minimum of two text lengths and a maximum of 75 text lengths. With these settings, the user cannot input text that is only one character long or text that is over 75 characters long.

Next, the user can click the ‘Input Message’ tab to write out the guiding prompt for the user.

Now every time someone attempts to enter a name, a message appears to remind the user to input their full first name as shown on their ID card.

Additional Resources
If you found this article on Excel data validation helpful and you're interested in learning more ways to level up your Excel skills, check out our Excel for Business and Finance Course and more using the get started button below.
Other Articles You May Find Helpful


Ready to Level Up Your Career?
Learn the practical skills used at Fortune 500 companies across the globe.