

How To Lock Cells In Excel
Cell locking is a security feature that limits access to specific cells in Excel.
Locking cells in Excel is an excellent way to safeguard your data from changes by others. This applies to specific cells, or alternatively, to the whole sheet. In this article, we will look at different ways to lock or unlock cells, rows, columns, or entire sheets in Excel.
Why Lock Cells in Excel?
Locking a cell in Excel and securing your file is the ideal solution for preserving your work and being able to share it with whomever you want.
To lock a worksheet in Excel, you must first go to the "Review” tab. As shown in the image below, click on the “Protect Sheet” option to access a window that will allow you to put the password on the Excel sheet if desired.
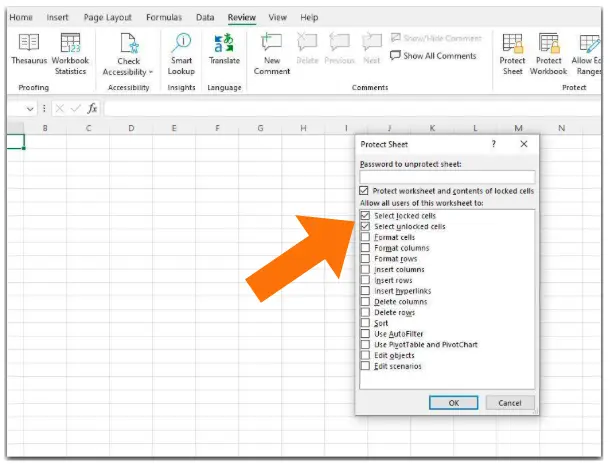
But how do you unlock the cells in Excel? Simply deselect the "Unprotect Sheet" option in the "Review" section, entering the password if applicable.
How to lock specific cells in Excel?
To lock specific cells, follow these steps:
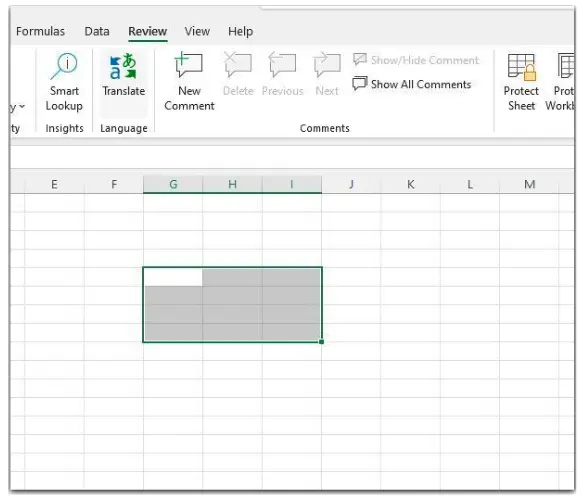
- Step 1: The first thing to do is to select the specific cells you want locked in Excel.
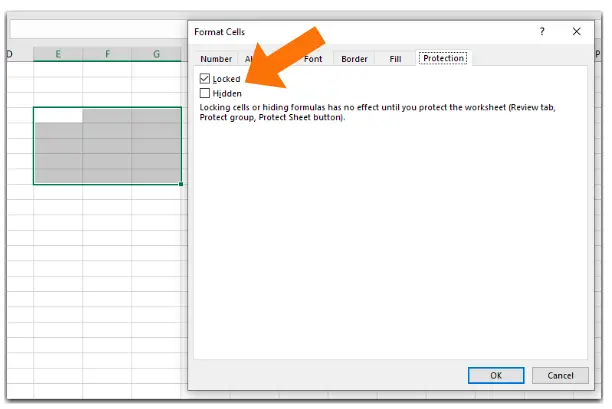
Step 2: Right-click on the highlighted cells, and from the drop-down menu, select the Format Cells icon.
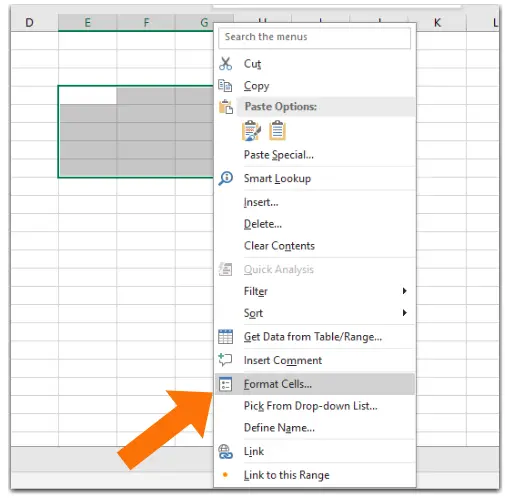
Step 3: Click on the Protection tab (the last item in the window). Deselect the "Locked" option (which is selected by default) and save everything by clicking "OK."
Now, we can lock Excel cells. All we have to do is go to the main screen, click on the "Review" tab, click " Protect sheet" then click on "OK." The result is clear; even after locking the worksheet, each user will still have the possibility to modify the cells we have not locked.
Another way to lock or unlock cells in Excel
Here’s another way to lock cells in Excel:
Step 1: Right-click on the Worksheet tab at the bottom of the screen.
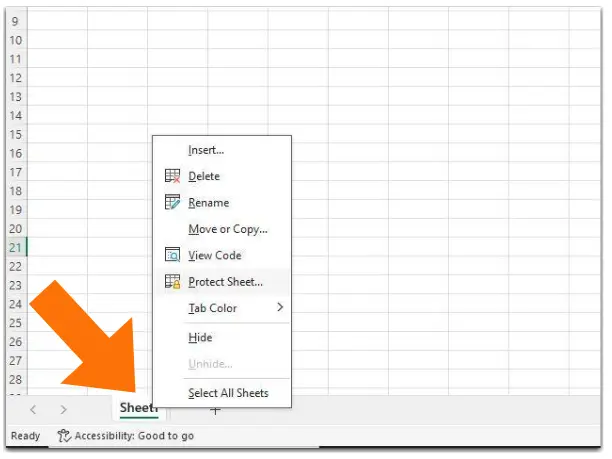
Step 2: Select the “Protect Sheet” option and a dialog box will appear. You can choose to protect your Excel sheet with a password or leave the "Protect your password in Excel" field blank.
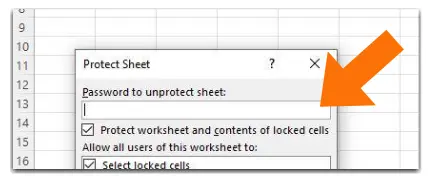
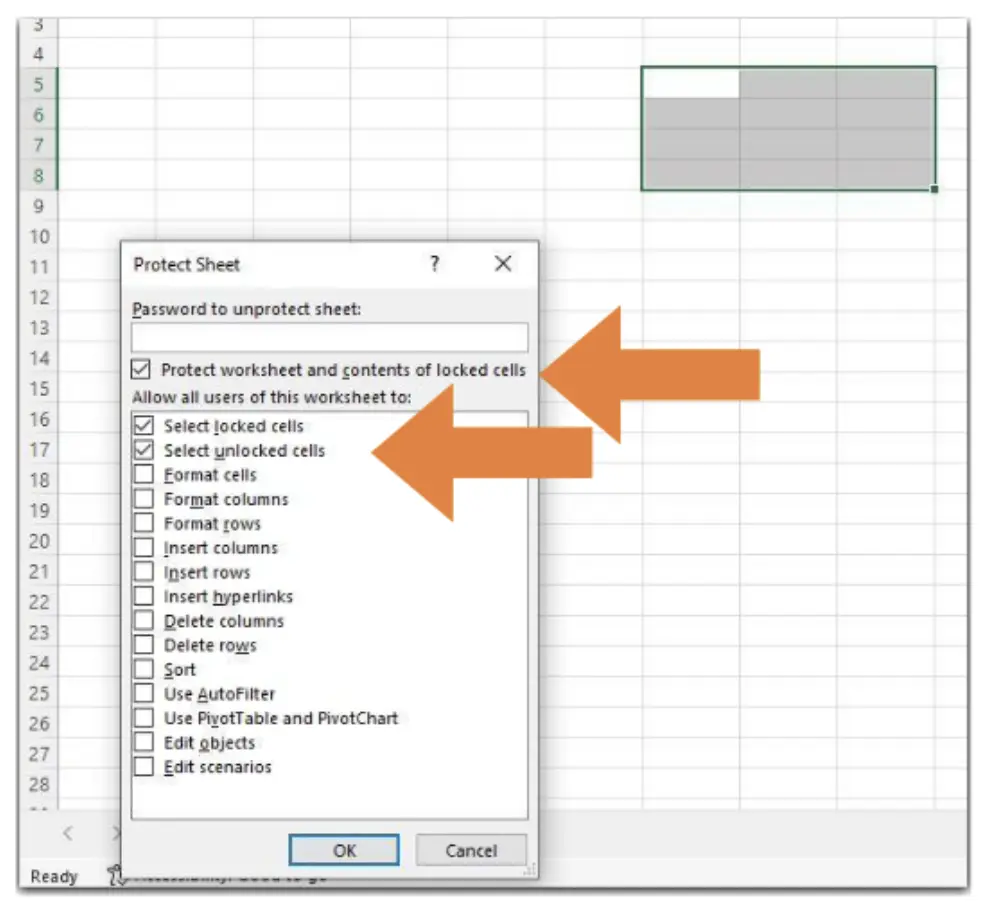
Step 3: Choose from the list you want to allow in your secure sheet and click “OK.” If you choose to enter your password, a Confirm Password dialog box will appear. Type your password again to complete the process.
How to open specific cells in a protected sheet?
When you want to edit specific cells in a protected Excel sheet. You can unlock individual cells in your sheet with a password. To do this:
Step 1: Select cells or ranges you want to open in a password-protected sheet.
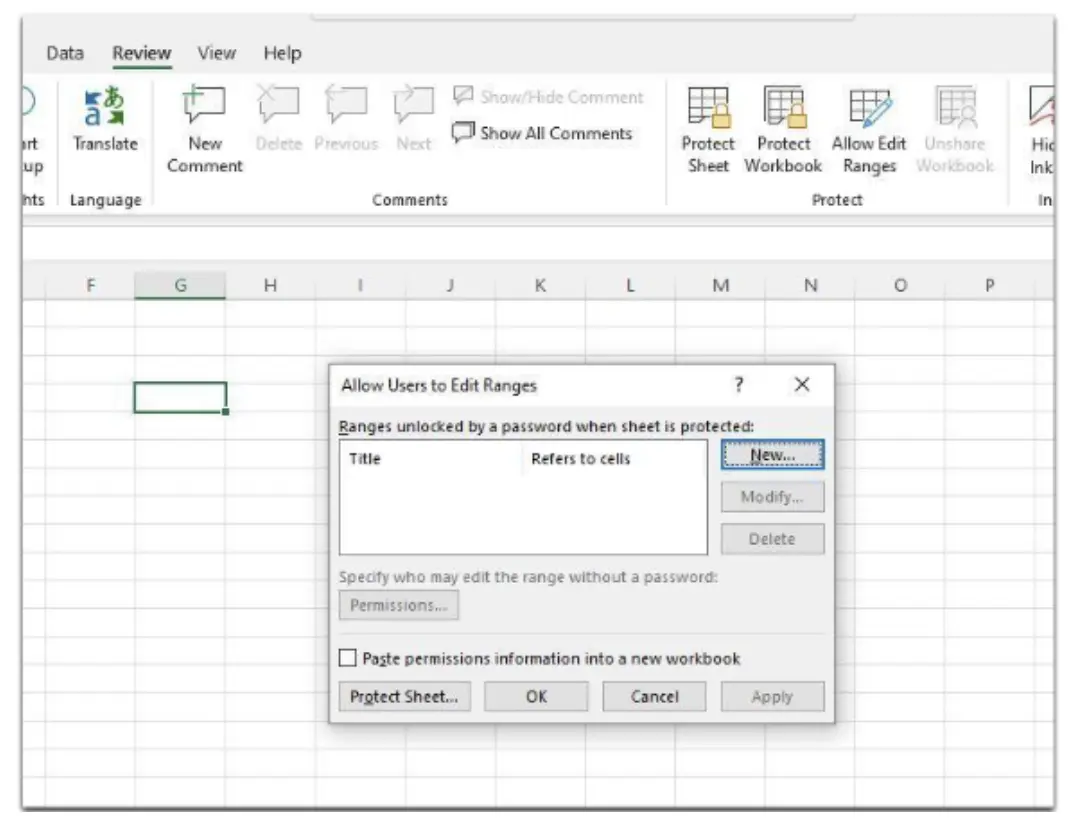
Step 2: In the “Review” tab, click on the “Allow Edit Ranges” option. Please note that you must first unlock the sheet to access the option. When you click the option mentioned above a dialog box titled “Allow Users to Edit Ranges” will appear. Click on the “New” option.
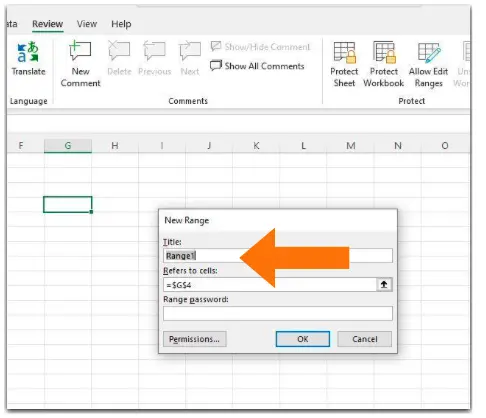
Step 3: A “New Range” dialog box will appear where you can set the “Title,” “Refers to cells,” and “Range Password” options. In the “Title” field, enter a name for your selection. In the “Refers to cells” field, type the range of cells if the selected range is now showing or you want to change it.
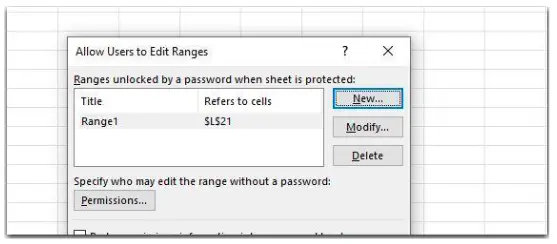
Step 4: Then, type your password in the “Range Password” field and click OK. Now, type your password again in the "Confirm Password" dialog box and click "OK" to finalise it. A new range will be added. You can follow the steps again to create multiple ranges.
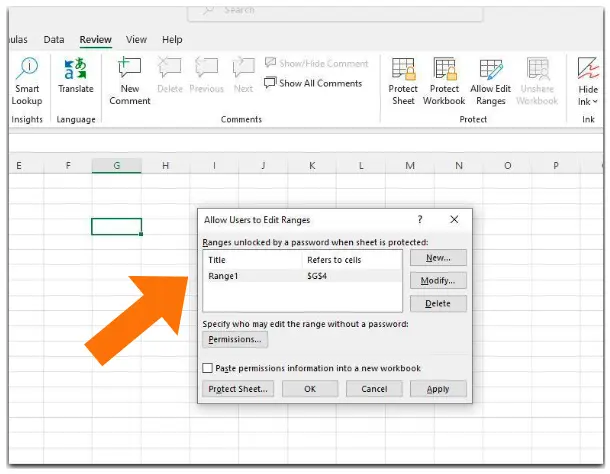
Step 5: Click the "Protect Sheet" button in the Review tab. Then, type a password in a “Protect Sheet” window for the entire sheet, choose the actions you want to allow, and click “OK.”
Step 6: Type your password again in the confirmation window, and your job is done.
Now, even if your sheet is protected, some protected cells will have an extra layer of protection and will only be unlocked with a password. You can also grant access to ranges without having to enter a password each time:
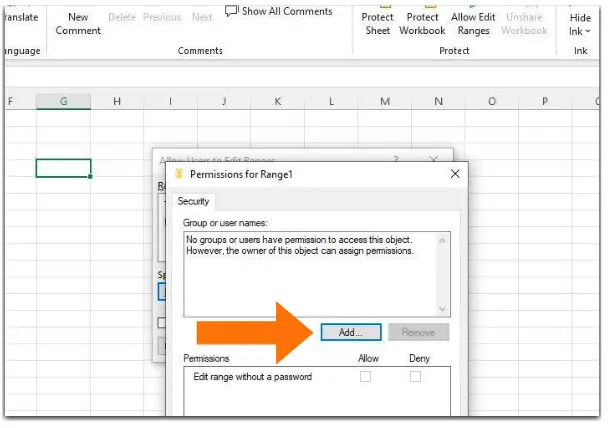
Step 1: Click the “Allow Edit Ranges” option from the tab. Select a range and click the “Permissions” button.
Step 2: Click the “Add” button in the window.
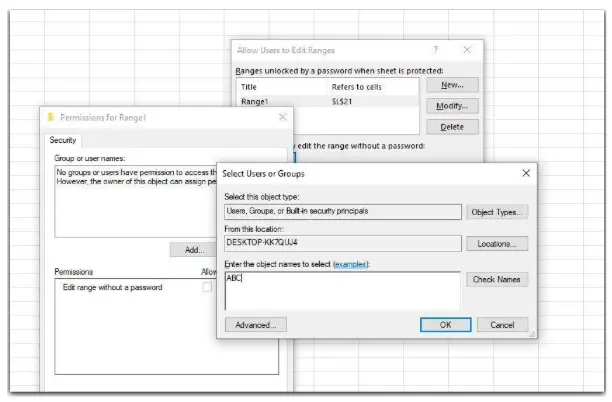
Step 3: Enter usernames in the “Enter object names to select” box. You can type the person's username as it is stored in your range. Click OK.
Step 4: Now select the permission for each user under “Group or Usernames” and select the Allow option. Click “OK,” and your job is done.
These are all the different ways you can lock or unlock Excel cells. Knowing how to secure your page is essential to protect it from accidental changes. You can protect or unprotect cells in an Excel sheet all at once or only select a specific range. You can also grant some users access with or without a password. Follow the steps above carefully, and you should be set!
Additional Resources
If you found this article useful, consider checking out our Excel for Business & Finance Course, where we help students learn the technical skills needed to perform in competitive finance and investment roles. Use this course to join our students who have landed roles at Goldman Sachs, Amazon, Bloomberg, and other great companies!
Other Articles You Might Find Helpful
- How to Unhide Columns and Rows in Excel: Learn how to quickly unhide columns and rows in Excel with real examples and suggested alternatives.
- How Many Rows Can Excel Handle?: Learn all about rows and columns in Excel, from hiding to inserting and deleting them.
- How to Freeze Rows and Columns in Excel: Learn how to freeze rows and columns in Excel with our simple guide featuring simple, step-by-step breakdowns and real examples.
- Excel ROUNDUP Function: Learn how to use the ROUNDUP function in Excel with usage directions, input definitions, and example use cases.


Ready to Level Up Your Career?
Learn the practical skills used at Fortune 500 companies across the globe.